Creating a Multi-Page Feedback Form in FlutterFlow

In this tutorial, we'll walk through the process of creating a multi-page feedback form in FlutterFlow. The form will include three pages: Rate Experience, Share Feedback, and Thank You Gift. We'll use the PageView widget to navigate between pages and add controls for smooth transitions.
Setting Up the Component
First, let's create a component that will house our PageView widget and the control buttons for navigation.
Step 1: Create the Main Component
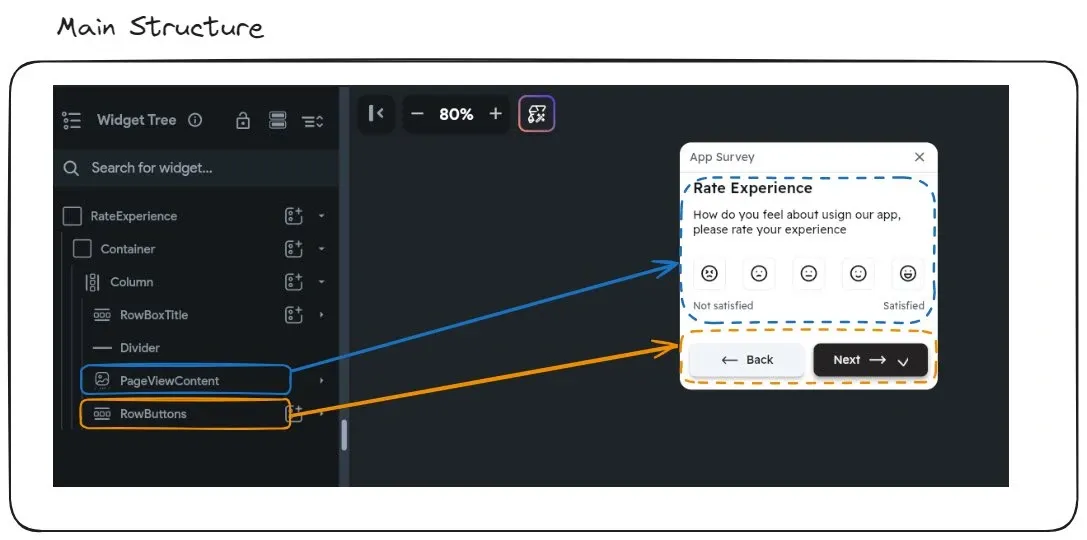
In FlutterFlow, start by creating a new component for the feedback form. This component will include a PageView widget to manage the pages and a Row widget for the control buttons.
Pro Tip:
The Row that contains the buttons is designed to prevent the controls from moving when navigating between pages with the PageView.
About the PageView Structure
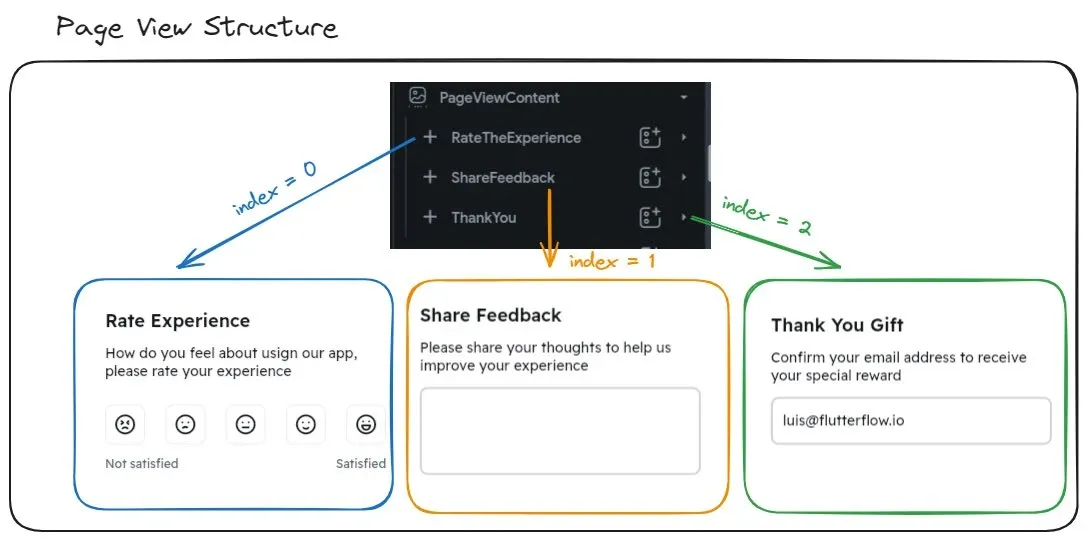
Our PageView will contain three different pages, controlled by the PageView index through the component's buttons.
Step 2: Create the Rate Experience Page
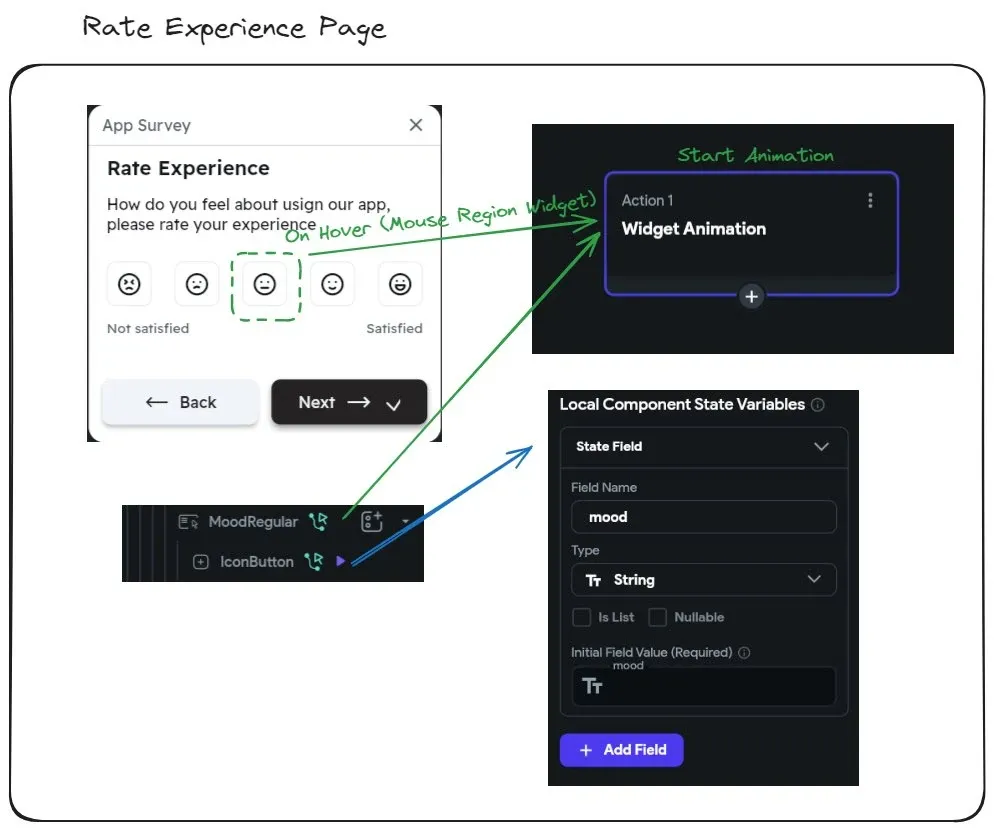
The first page will be the Rate Experience page. Here, we'll use a widget that can only be used on the web (MouseRegion). This widget identifies when the mouse is within a region and executes an action (animation). If the user clicks, we update the local component state (e.g., mood).
Step 3: Create the Share Feedback Page
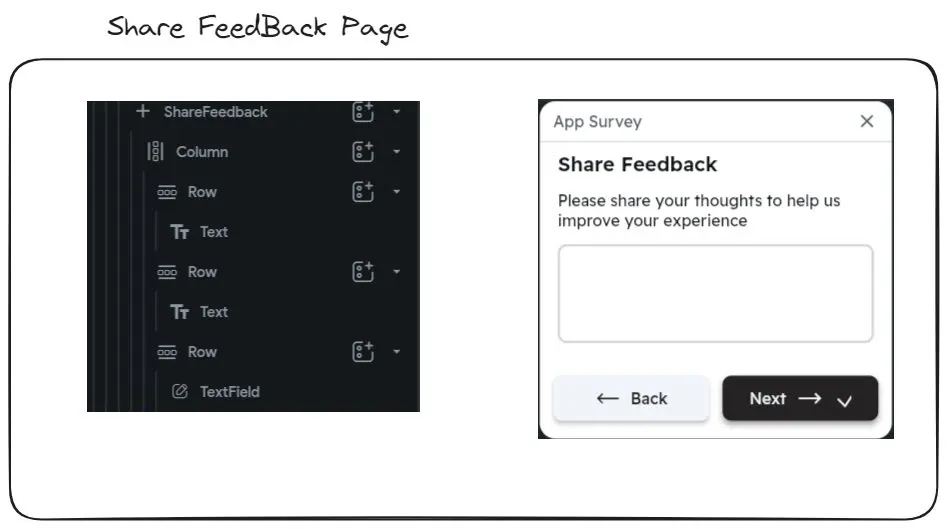
The second page will be the Share Feedback page. Here, we'll have a TextField to capture user feedback and store it in a variable.
Adding the Share Feedback Page
- In the second page of the PageView, add a Column widget.
- Add a Text widget with the text "Share Your Feedback".
- Add a TextField widget below the text for user input.
Step 4: Create the Thank You Gift Page
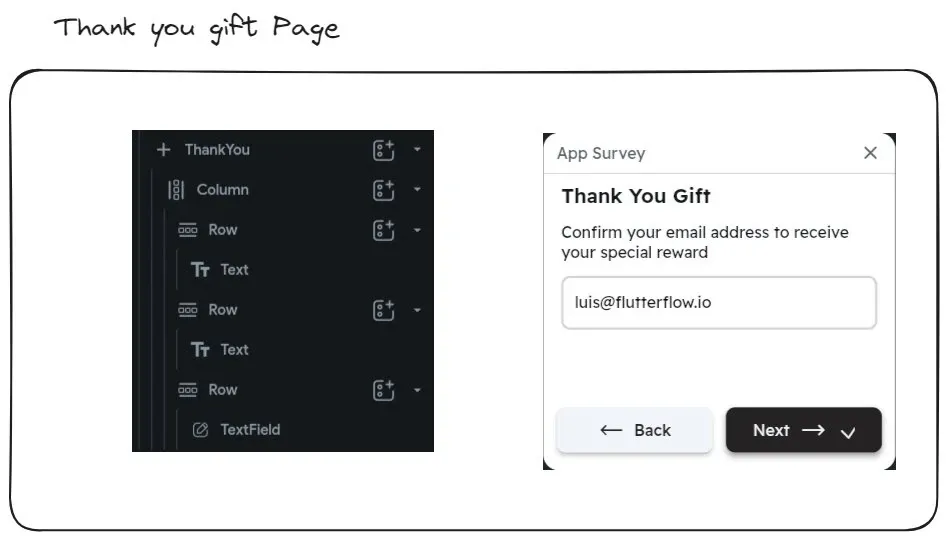
The third page will be the Thank You Gift page. This page is similar to the previous one but includes an action to send an email to the user or save the information in a database.
Adding the Thank You Gift Page
- In the third page of the PageView, add a Column widget.
- Add a Text widget with the text "Thank You! Here is your gift".
- Add any additional actions or widgets, such as a button to send an email or save data.
Adding Controls
Next, we'll discuss some tricks for managing visibility, animations, and statuses of the control buttons.
Step 5: Managing PageView Controls
We handle the navigation and control visibility using the indexes of the PageView, different icons, and animations. Here's how we can do it:
- Visibility Management: Show or hide the back button based on the current page index.
- Statuses: Update the local state to reflect the current page and any actions taken by the user.
Example
In FlutterFlow, set up the control buttons to handle page navigation:
- For the back button, add an action to navigate to the previous page.
- For the forward button, add an action to navigate to the next page.
- Use conditions to show or hide the back button based on the current page index.

Conclusion
In this tutorial, we've built a multi-page feedback form in FlutterFlow using the PageView widget. We've added controls for smooth navigation and demonstrated how to manage visibility, animations, and statuses for the controls. By following these steps, you can create a seamless feedback form for your FlutterFlow applications.
For more details and code examples, you can refer to the original post threads here.